Roof installation is a crucial process that requires careful planning and execution. Whether you are building a new home or replacing an old roof, understanding the step-by-step installation process can help ensure a successful project. So, how is a roof installed? In this guide, we will take a closer look at how roofs are installed and provide valuable insights for a smooth installation experience.
Understanding the Basics of Roof Installation
Before diving into the installation process, it is important to have a basic understanding of how roofs are installed. A roof is not just a cover for your home; it plays a vital role in protecting your property from the elements, enhancing energy efficiency, and improving the overall aesthetics. Therefore, proper installation is essential to maximize the lifespan and performance of your roof.
Roof installation begins with a thorough inspection of the existing roof structure to assess its condition and identify any underlying issues that need to be addressed. This step is crucial in ensuring a solid foundation for the new roof. The next phase involves preparing the roof deck by installing appropriate underlayment and ensuring proper ventilation to prevent moisture buildup.
Importance of Proper Roof Installation
A properly installed roof provides several benefits, including protection against leaks, structural damage, and energy loss. It ensures that your home remains comfortable, safe, and structurally sound. Furthermore, a well-installed roof enhances the curb appeal of your property and increases its resale value.
Proper roof installation also involves following local building codes and regulations to ensure compliance with safety standards. This not only protects your investment but also guarantees the longevity of your roof. Additionally, using high-quality materials and skilled labor during the installation process can significantly impact the performance and durability of your roof.
Different Types of Roofs and Their Installation Processes
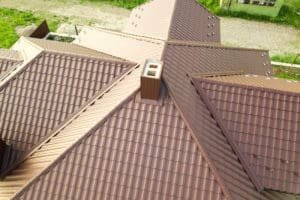
There are various types of roofs, including asphalt shingles, metal, tile, and flat roofs. Each type has its specific installation requirements and processes. It is important to choose a roofing material that suits your needs and consider the installation process involved. Consulting with a professional roofer can help you make an informed decision.
For example, asphalt shingles are one of the most popular roofing materials due to their affordability and ease of installation. Metal roofs, on the other hand, offer superior durability and energy efficiency, making them a great long-term investment. Tile roofs are known for their aesthetic appeal and longevity, but they require specialized installation techniques. Flat roofs are common in commercial buildings and require proper drainage systems to prevent water pooling.
Pre-Installation Preparation

Before starting the roof installation, certain preparatory steps are necessary to ensure a successful project. Here are a couple of important aspects to consider:
Assessing the Condition of Your Old Roof
If you are replacing an existing roof, it is crucial to assess its condition beforehand. An inspection will help identify any underlying issues that need to be addressed before the installation begins. This includes checking for leaks, structural damage, or any signs of wear and tear.
Additionally, it is essential to consider the type of material used in your old roof. Understanding the previous roofing material can help in determining the best approach for the new installation. Different materials require specific installation techniques and may impact the overall cost and timeline of the project.
Gathering Necessary Roofing Materials
To ensure a smooth installation process, it is important to gather all the necessary roofing materials in advance. This includes shingles, underlayment, nails, flashings, and any additional components required for your specific roofing type. This step helps prevent delays and ensures a seamless installation.
Moreover, when gathering materials, it is advisable to purchase slightly more than the estimated quantity to account for any wastage or unexpected needs during the installation. Having extra materials on hand can prevent interruptions and last-minute runs to the store, ensuring the project stays on track.
The Roof Installation Process

Now that the pre-installation preparation is complete, let’s delve into the actual roof installation process. This step-by-step guide will give you a clear understanding of what to expect.
Roof installation is a meticulous process that involves several crucial steps to ensure a durable and long-lasting roof for your home. Understanding each phase of the installation process can help you appreciate the craftsmanship and attention to detail required in this essential home improvement project.
Removing the Old Roof
The first step is removing the old roof. This involves stripping off the existing shingles, underlayment, and any other roofing material. It is crucial to do this carefully, ensuring the underlying structure is not damaged during the removal process.
Removing the old roof is not just about aesthetics; it also allows for a thorough inspection of the roof deck to identify any underlying issues that need to be addressed before the new roof is installed. This step sets the foundation for a successful roof installation and ensures that the new roof will have a solid base to rest upon.
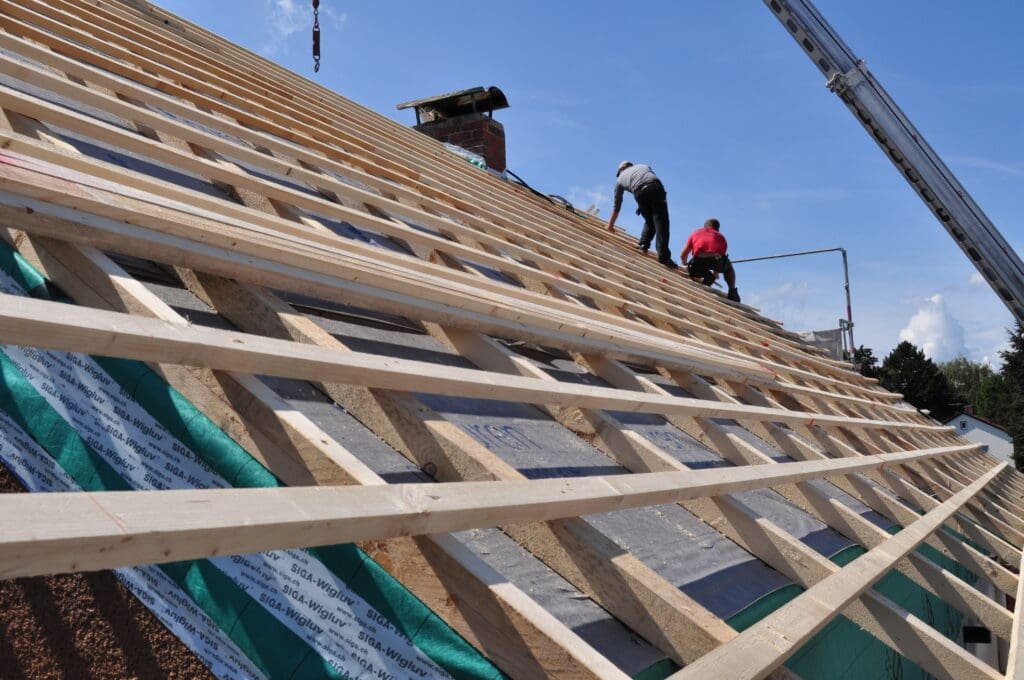
Installing the Roof Deck Protection
After removing the old roof, the next step is to install the roof deck protection. This layer acts as a barrier against water infiltration and provides an additional layer of protection for your roof. It also helps create a flat and even surface for laying down the shingles.
Roof deck protection is a critical component of the roofing system, as it helps prevent water damage and prolongs the life of the roof. By investing in quality roof deck protection, you can enhance the overall performance and durability of your roof, providing peace of mind for years to come.
Applying Leak Barriers
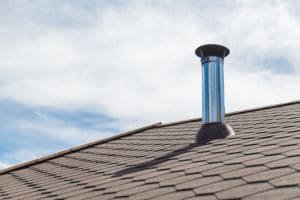
Installing leak barriers is an essential step in preventing water penetration. These barriers are typically applied in areas prone to leaks, such as valleys, roof edges, and around chimneys or skylights. Leak barriers act as an added protection layer, ensuring a watertight seal.
Leak barriers play a crucial role in safeguarding your home against water intrusion, which can lead to costly repairs and structural damage. By strategically applying leak barriers in vulnerable areas, roofers can mitigate the risk of leaks and enhance the overall waterproofing capabilities of the roof.
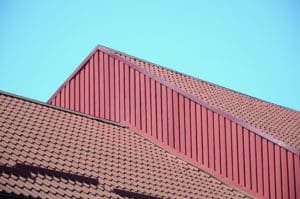
Laying Down Roof Shingles
One of the final steps in roof installation is laying down the roof shingles. This step requires precision and attention to detail. Whether you choose asphalt, metal, or tile shingles, following manufacturer guidelines for installation is crucial to ensure proper performance and longevity.
Roof shingles not only contribute to the aesthetic appeal of your home but also serve as the primary defense against the elements. Proper installation of roof shingles is essential for weatherproofing and insulating your home, providing protection against rain, wind, and other environmental factors. By selecting high-quality shingles and installing them correctly, you can enhance the curb appeal and resilience of your roof.
Post-Installation Procedures
After the roof has been installed, it is important to undertake certain post-installation procedures to ensure that everything is in order.
Post-installation procedures are crucial in ensuring the longevity and performance of your newly installed roof. These steps not only help in maintaining the aesthetic appeal of your property but also contribute to the overall structural integrity of the building. By following these procedures diligently, you can avoid potential issues and costly repairs in the future.
Inspecting the Installed Roof
After the installation is complete, it is essential to inspect the roof for any visible defects or issues. This includes checking the shingles, flashings, and overall alignment of the roof. If you notice any problems, contacting the roofing contractor immediately is advisable.
During the inspection process, pay close attention to the quality of workmanship and materials used in the installation. Look for any signs of damage, such as cracked shingles, loose flashings, or improper sealing. Addressing these issues promptly can prevent water leaks, structural damage, and other potential problems that may arise in the future.
Maintenance Tips for Your New Roof
Maintaining your new roof is crucial for its longevity and performance. Regular inspections, cleaning of debris, and addressing any issues promptly can help extend the lifespan of your roof. Additionally, consulting with a professional roofing company for regular maintenance can ensure the optimal function of your roof over time.
Proper maintenance of your roof involves more than just visual inspections. It also includes clearing debris such as leaves, branches, and dirt that can accumulate on the roof surface and in the gutters. Clogged gutters can lead to water backup, causing damage to the roof and the underlying structure. By keeping your roof clean and free of debris, you can prevent potential drainage issues and maintain the efficiency of your roofing system.
Hiring a Professional vs DIY Roof Installation

While some homeowners may choose to install a roof themselves, it is important to weigh the pros and cons before making a decision.
Roof installation is a critical aspect of home maintenance that requires careful consideration. It serves as the first line of defense against the elements, protecting your home and loved ones. Whether you opt for a professional or DIY approach, ensuring a sturdy and weatherproof roof is paramount.
Pros and Cons of DIY Roof Installation
DIY roof installation can save money on labor costs and provide a sense of accomplishment. However, it requires a high level of skill, knowledge, and safety precautions. Climbing on the roof, handling heavy materials, and using specialized tools all pose potential risks for DIY enthusiasts. Moreover, the lack of experience may result in overlooking crucial details, leading to leaks, structural damage, or even safety hazards for occupants.
When to Hire a Professional Roofer
If you are not confident in your roofing abilities or lack experience in the field, it is recommended to hire a professional roofer. Professional installers have the expertise, tools, and knowledge necessary to ensure a trouble-free installation. They undergo rigorous training to handle various roofing scenarios, from flat roofs to steep pitches, and are well-versed in industry best practices.
Furthermore, professional roofers are equipped to handle unexpected challenges that may arise during the installation process. Whether it’s addressing hidden water damage, ensuring proper ventilation, or navigating around existing structures like chimneys or skylights, their experience allows for efficient problem-solving and seamless execution.
In conclusion, understanding the step-by-step process of roof installation is essential for a successful roofing project. From pre-installation preparation to the final post-installation procedures, each step plays a vital role in the quality and longevity of your roof. Whether you choose to DIY or hire a professional, proper installation ensures a durable, protective, and aesthetically pleasing roof for your home.