If you’re a homeowner, it’s important to understand the basics of shingle replacement. Your roof is one of the most vital aspects of your home, and damaged or deteriorating shingles can lead to leaks and other problems. In this guide, we’ll walk you through the process of shingle replacement, from understanding its importance to the post-replacement care.
Understanding Shingle Replacement

The Importance of Shingle Replacement
Shingles are designed to protect your roof from various elements such as rain, snow, and sunlight. Over time, they can become worn, cracked, or damaged, compromising their ability to keep your home safe and dry. Regular maintenance and timely shingle replacement are crucial to avoid potential problems like water damage, mold growth, and structural issues. By staying on top of shingle replacement, you can prolong the lifespan of your roof and save yourself from costly repairs down the road.
Types of Roof Shingles
Before diving into the replacement process, it’s essential to familiarize yourself with the different types of roof shingles available. The most common options include:
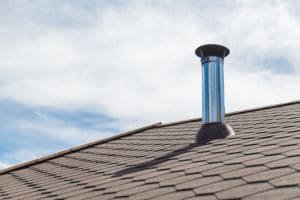
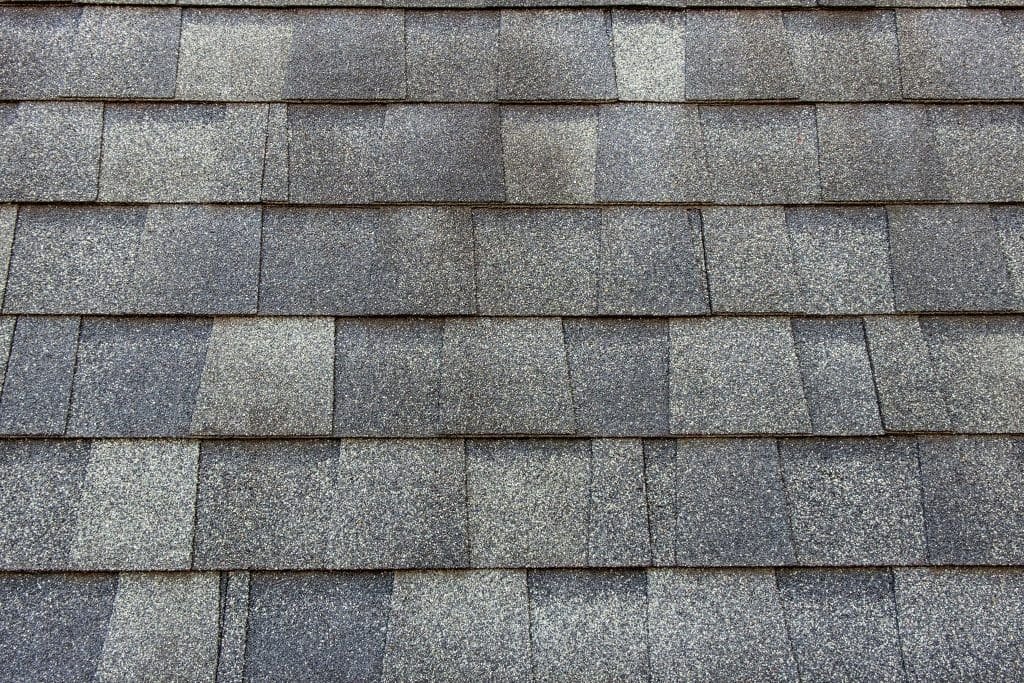
- Asphalt shingles: These are the most popular choice due to their affordability, durability, and ease of installation.
- Wood shingles and shakes: While they offer a rustic and natural look, they require more maintenance and are prone to rot and insect damage.
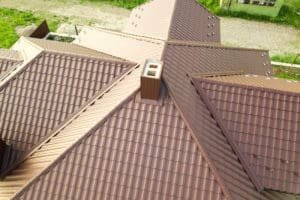
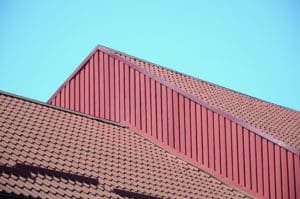
- Metal shingles: Known for their longevity and energy efficiency, metal shingles are becoming increasingly popular.
- Slate shingles: Considered a high-end option, slate shingles offer unmatched elegance and durability, but they come with a higher price tag.
- Tile shingles: Commonly found in Mediterranean-style homes, tile shingles are known for their aesthetic appeal and exceptional longevity.
Each type of shingle has its own benefits and considerations, so be sure to choose one that aligns with your budget, style preferences, and weather conditions in your area.
When it comes to asphalt shingles, they are not only affordable and durable but also available in a wide range of colors and styles. This allows homeowners to choose a shingle that complements the overall aesthetic of their home. Additionally, asphalt shingles are relatively easy to install, making them a popular choice for both professional contractors and DIY enthusiasts.
Wood shingles and shakes, on the other hand, offer a unique and charming look that adds character to any home. However, it’s important to note that they require regular maintenance to prevent issues such as rot and insect infestation. Homeowners who opt for wood shingles should be prepared to invest time and effort into preserving their natural beauty.
Preparing for Shingle Replacement

Evaluating Your Current Roof
Before jumping into the shingle replacement process, it’s crucial to assess your current roof. Take the time to inspect for any signs of damage, such as missing or curling shingles, granule loss, or visible cracks. It’s also essential to check for any leaks or water stains inside your home, as these can indicate roof damage. By thoroughly evaluating your roof’s condition, you can determine if a full shingle replacement is needed or if minor repairs will suffice.
Furthermore, when evaluating your current roof, pay attention to the roof’s overall structure and ventilation. Proper ventilation is essential for the longevity of your new shingles, as it helps regulate temperature and moisture levels in the attic. Ensure that vents are clear of debris and functioning correctly to prevent issues such as mold growth and premature shingle deterioration.
Choosing the Right Shingles for Your Home
Once you’ve determined the need for shingle replacement, it’s time to choose the right shingles for your home. Consider factors such as durability, lifespan, aesthetics, and cost when making your selection. Additionally, consult with roofing professionals or specialists who can offer guidance based on your specific needs and preferences.
It’s also important to think about the climate in your area when selecting shingles. Different types of shingles perform better in certain climates, so choosing the right material can help improve the overall performance and longevity of your roof. For example, in areas with high winds, impact-resistant shingles may be a better option to withstand severe weather conditions.
The Shingle Replacement Process

Replacing damaged shingles is an important task to maintain the integrity and longevity of your roof. Whether you’re a seasoned DIY enthusiast or a homeowner looking to save some money, understanding the shingle replacement process is essential. In this guide, we will walk you through the step-by-step process, ensuring a successful and efficient project.
Tools Needed for Shingle Replacement
Before you begin the shingle replacement process, gather the necessary tools to ensure a smooth operation. While the basic tools you’ll need include a hammer, nails, pry bar, utility knife, and roofing cement, it’s important to note that the complexity of the project and personal preference may require additional tools. Consulting with a professional or referring to the manufacturer’s guidelines is always a good idea to ensure you have everything you need.
Now, let’s dive into the step-by-step guide to shingle replacement:
Step-by-Step Guide to Shingle Replacement
- Start by removing the damaged shingles: Using a pry bar, carefully remove the damaged shingles, ensuring not to damage the surrounding ones in the process. Take your time and exercise caution to avoid any unnecessary mishaps.
- Clean the area: Once the damaged shingles are removed, clean the area by getting rid of any debris or nails left from the old shingles. A clean surface is crucial for proper installation.
- Inspect the roof deck: Take a moment to inspect the roof deck for any signs of damage or rot. If you come across any damaged sections, be sure to replace them promptly to maintain the structural integrity of your roof.
- Install an underlayment: To provide an extra layer of protection against moisture, it’s recommended to install an underlayment such as roofing felt. This will help safeguard your roof from potential leaks and water damage.
- Begin installing the new shingles: Starting from the bottom, work your way up when installing the new shingles. Follow the manufacturer’s instructions carefully to ensure proper installation techniques and maximize the shingles’ performance.
- Secure the shingles in place: Depending on the type of shingles you’re using, secure them in place using nails or roofing cement. This will ensure that they stay firmly attached, withstanding various weather conditions.
- Continue the process: Repeat the installation process until all damaged shingles are replaced. Take your time and pay attention to detail to achieve a seamless and visually appealing result.
- Inspect your work: Once you’ve completed the shingle replacement, inspect your work for any loose shingles or gaps. Make any necessary adjustments to ensure a tight and secure fit.
Remember, safety should always be a top priority during the shingle replacement process. Use a ladder with proper stability, wear personal protective equipment (PPE) like gloves and safety goggles, and exercise caution at all times. If you’re unsure about any aspect of the project, it’s best to seek professional assistance to ensure the job is done correctly and safely.
By following this step-by-step guide and using the right tools and techniques, you can successfully replace damaged shingles and maintain the beauty and functionality of your roof for years to come.
Safety Measures During Shingle Replacement
Personal Protective Equipment
Your safety should always be a priority when working on your roof. When undertaking shingle replacement, wearing personal protective equipment (PPE) is essential. This can include:
- Safety goggles
- Work gloves
- Sturdy footwear
- Hard hat
These items will help protect you from potential injuries and ensure a safer working environment.
Moreover, it is crucial to ensure that your PPE fits properly and is in good condition. Safety goggles should provide a secure and clear field of vision, work gloves should be free of tears or holes, sturdy footwear should have slip-resistant soles, and the hard hat should fit snugly on your head. Regularly inspecting and replacing worn-out PPE is essential for maintaining your safety while working on the roof.
Safety Precautions on the Roof
In addition to wearing appropriate PPE, follow these safety precautions while on the roof:
- Always use a secure and stable ladder to access the roof.
- Stay away from power lines to avoid electrical hazards.
- Be cautious of slippery surfaces, especially when the roof is wet or covered in debris.
- Work in pairs whenever possible, ensuring someone is nearby in case of an accident.
By taking these safety measures, you can reduce the risk of accidents and injuries during shingle replacement.
Furthermore, before starting any work on the roof, it is advisable to check the weather forecast. Avoid working on the roof during windy or rainy conditions, as this can increase the risk of accidents. Additionally, familiarize yourself with the layout of the roof and identify any weak spots or areas of concern before stepping onto it. Taking the time to assess the condition of the roof can help you plan your work effectively and minimize potential safety hazards.
Post Shingle Replacement Care

Maintaining Your New Shingles
Once you’ve completed the shingle replacement, it’s important to maintain your new shingles to maximize their longevity. Regularly inspect your roof for any signs of damage, clean off debris, and trim nearby tree branches to prevent potential issues caused by falling leaves or branches. Additionally, consider scheduling professional inspections every few years to ensure the overall health of your roof.
Inspecting your roof after a heavy storm is also crucial to catch any damage early on. Look for missing or damaged shingles, as well as signs of water leakage. Addressing these issues promptly can prevent further damage and prolong the lifespan of your roof. Moreover, keeping your gutters clean and free of debris will help maintain proper drainage and prevent water from seeping under the shingles.
When to Consider Professional Inspection
While shingle replacement can often be a DIY project, there are instances where professional inspection is necessary. It’s advisable to consult a roofing professional if:
- Your roof is severely damaged or has multiple leaks.
- You’re unsure of the proper techniques or tools required.
- You’re dealing with specialty shingles or complex roof designs.
- Your roof is still under warranty, and professional installation is required to maintain coverage.
Professional roofers have the expertise and experience to handle complex roof issues and ensure a high-quality replacement.
Additionally, if you live in an area prone to extreme weather conditions such as hurricanes or heavy snowfall, seeking professional advice on reinforcement and weatherproofing measures can help safeguard your roof against potential damage.
By following these guidelines, you’ll be well-equipped to tackle shingle replacement and maintain the integrity of your roof. Remember, regular maintenance and timely replacements are key to a durable and long-lasting roof.